Tuesday, 29 October 2019

Portuguese tiles Nettie dress

Pattern: Nettie Dress + Bodysuit Pattern by Closet Case Patterns
Fabric: 1.4 m ‘Portuguese tiles’ fabric, part polyester part viscose
Haberdasheries: None!

Making this dress was so little effort that I hardly understand why anyone would go shopping! What was also easy is that it could be sewed on a regular machine, since the fabric doesn’t fray. I don’t quite understand why knit fabric doesn’t fray whereas a knit sweater that hasn’t been finished properly would, but it’s certainly convenient. I had some serger problems a while ago and didn’t feel like doing lots of test runs now, so I just sewed this on my regular machine using a zigzag stitch. I also zigzagged the hem and sleeves, as the usual double needle stitching causes a tunnel, which I find a lot less professional looking than a nice flat zigzag!


I got the pattern in Closet Case Patterns’ thanksgiving sale. I didn’t want the dress to have the bodycon effect it’s supposed to have as I have high hips, so a looser fit is more flattering on me. Therefore I cut a size 16 (!), although I ended up sewing a 14 – and grading to 12 at the arm hole. I ended up using the sleeves from the Lady Skater Dress pattern by Kitschy Coo as I thought the Nettie sleeves were strangely off the shoulder. And I added a seam in the back piece as a swayback alteration. So in the end I guess I might as well have improvised this dress based on my tried and tested Lady Skater pattern, while I was trying to make things easier for myself by not improvising… However, this way I also have a bathing suit pattern for when I want to make a 1920s bathing suit.


I liked the colour and pattern of the fabric (and its name, as I love Portugal – although Portuguese tiles or azulejos are usually blue) but I’m certainly not going to buy fabrics with a high artificial fabric content anymore. When I buy clothes I always check the label first and don’t even try them on if they’re not made of natural fabrics, since those are so much more comfortable to wear and also more environmentally friendly (washing artificial fabrics causes microplastics to end up in the water!), and it’s rather silly to put in effort making my own clothes by a different standard.

The zigzag sleeve hem
Kitty testing the fabric :P. She liked it!


Sunday, 8 September 2019

Miette jeans skirt

Pattern: Miette by Tilly and the Buttons
Fabric: thin denim
Haberdasheries: none!

A while ago I made a jeans wrap skirt using the Miette pattern from Tilly and the Buttons. Another fine example of sewing with kitty! :P She attacked my scissors while I was cutting the pattern paper, my pencil as I was tracing… She sneaked up on me and I noticed for the first time that I do not hear her walk! One moment she’d be three metres away, the next, two metres closer. Veeery relaxed sewing knowing that you might be jumped at any moment without hearing it coming! Needless to say sewing this skirt went very quickly, too.


Hehe, Juniper isn’t a terrorcat by any means, she just gets playful around sewing materials! And I have since learned that if I want to make things easy for myself the best time to cut my fabric is during her afternoon nap of four hours!
So, I did finish the skirt eventually. Apart from the feline intervention, the pattern (which is meant for beginners) was easy and quick to sew and the resulting skirt is very comfortable to wear, although it does freak me out a little that the overlapping flap at the back could be lifted by the wind when I’m outside, or accidentally be pushed aside when I move. As you can see from the foliage I took these photos very recently :P.


Saturday, 31 August 2019

1940s half slip


Pattern: improvised
Fabric: white viscose dyed powder pink
Haberdasheries: two snaps, one hook, 1.4 m light pink lace, elastic for the waist

Hey y’all, I took a bit of a break from blogging because it was feeling too much like a chore and I wanted to focus more on sewing rather than writing about it. But now I’m back and have quite a few unblogged projects, so you can expect many more posts the coming time.

One of the things I’ve made is a 1940s half slip. I improvised the pattern, which is a simple A line skirt. I used a white viscose fabric which I dyed powder pink using Dylon fabric dye in the colour powder pink :P. Strangely this colour, among a few others, is not sold in my country so I had to get it from eBay. I used this colour before to dye some granny underwear from Hema that I use with 1940s clothes (see here) and the colour turned out much brighter, and also a different shade (less peach pink), on that cotton fabric than on this viscose, but the resulting very light pink was what I was going for. It’s a classic 1940s underwear colour.


I made French seams because the fabric is quite thin and sheer, and a placket with snap fasteners and a hook and worked eye to close the slip. I might replace the snaps with more hooks and eyes though, because they have a tendency to pop open when I sit down!


I learned a ‘couture’ technique for sewing on hooks for this project. Doesn’t it look nice?

Wednesday, 19 June 2019

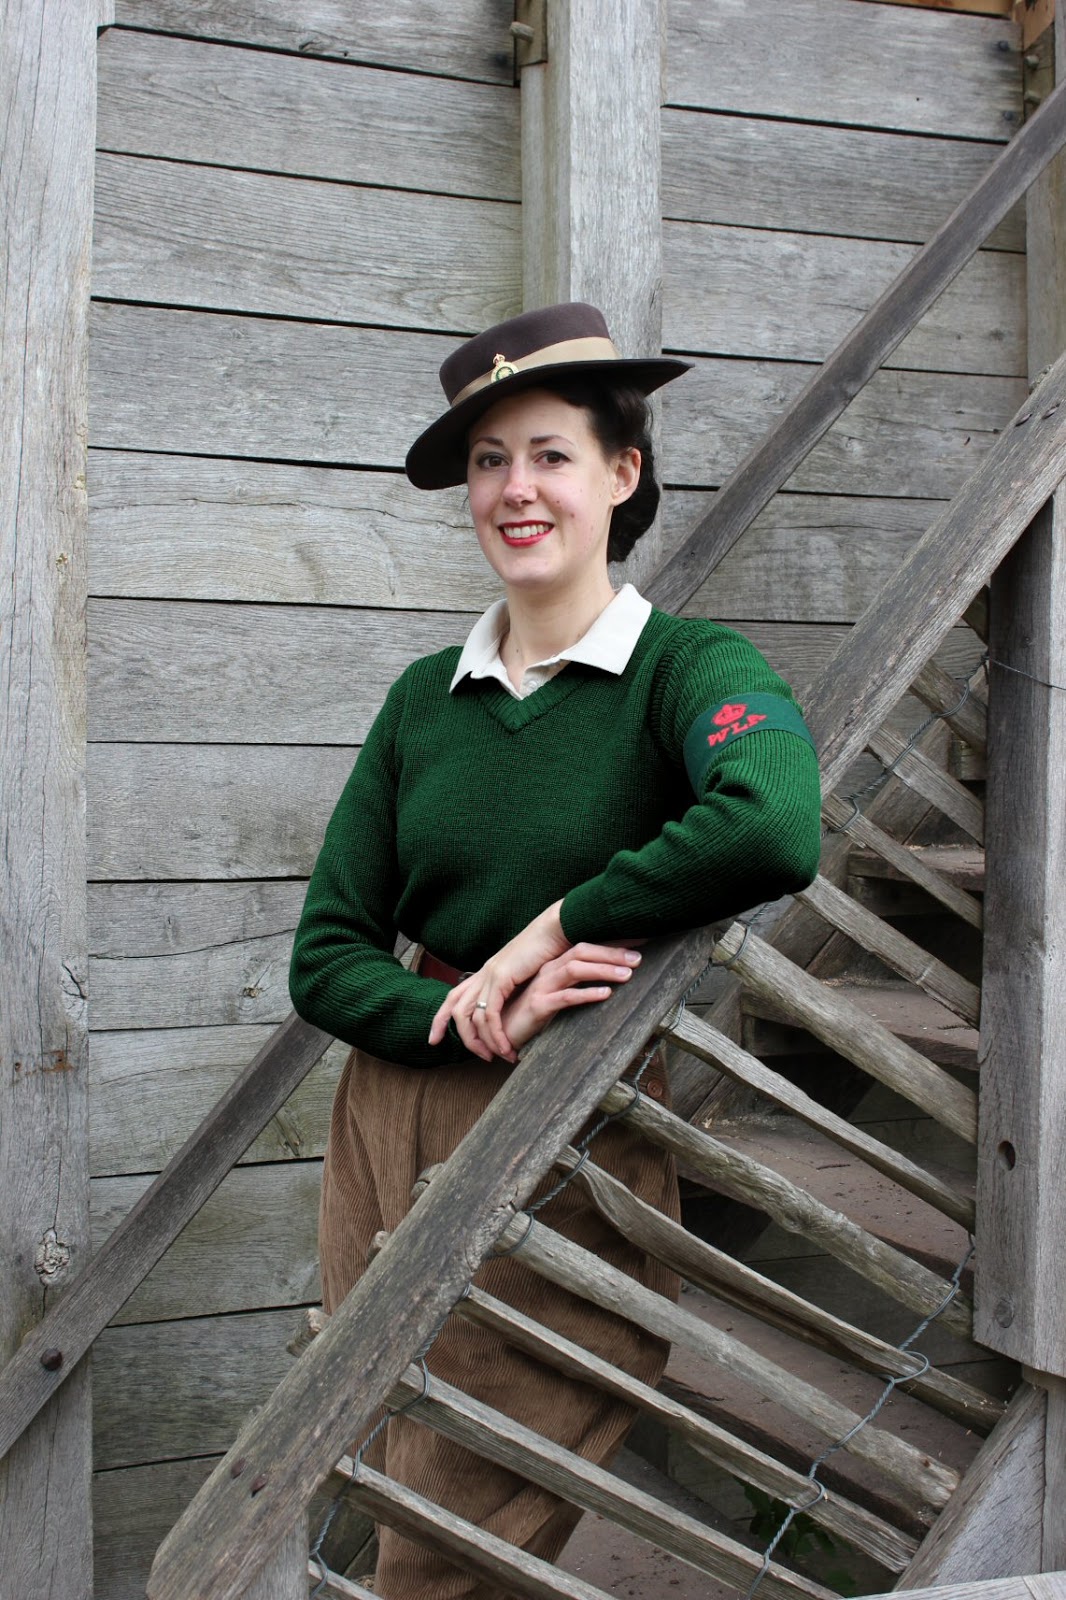
Women’s Land Army jumper – and how you can make your own!

Pattern: none
Fabric: a 100% wool knit Dutch army sweater
Haberdasheries: none


Yes, finally I’ve got a WLA jumper! (And finally my uniform contains one piece that is actually my colour! :P) In my opinion this is one of the hardest WLA uniform pieces to obtain, because there are no good reproductions available. Some web shops do offer them, but unfortunately the only thing they’ve got in common with the real thing is that they’re green and sometimes ribbed. However, they’re always made of cotton whereas original WLA sweaters were made of wool (and I know which I prefer for re-enactment events as well!), and even if they’re ribbed, the rib used is not the same at all.

So I’d been thinking about how I was going to make a good WLA jumper. There were hand knitting patterns for them at the time, but I didn’t feel like knitting one because frankly, an entire sweater in k1p1 is just boring! Then my husband mentioned he had an old Dutch army sweater lying around that he wasn’t using anymore, and it turned out to be 100% superwash wool and exactly the right fisherman’s rib!

This is what the sweater looked like, nice Dutch flag and all :P:


I removed the stitched on cotton pieces and took the jumper apart, then sewed it back together, making it much smaller. Luckily, as the army sweater was too long anyway, I could omit using the part of the body which had the shoulder pieces, as the stitching left dents which even blocking didn’t remove. This was also the case with the sleeves, but I couldn’t avoid using those bits.

Creating the v-neck collar took the most effort. I carefully took off the collar, threading all its loops with scrap yarn, then made the v-shape and hand sewed the collar onto the jumper, taking care to reattach each loop.

And then all that had to be done was dyeing the jumper the correct shade of green! I say ‘all’, but this took some experimentation. I had experience with Dylon textile dye and although it isn’t meant specifically for wool I assumed it would work. The packaging says that ‘lighter shades will be achieved in wool’, so I thought I’d just add a bit more dye than specified. I did several dye tests on leftover bits of the army sweater, using varying ratios of Dark Green, Emerald Green and Tropical Green – and found that using Dylon in a lighter, bright colour in order to add intensity doesn’t work at all. Eventually I got a relatively bright green, but I had used so much Dylon dye to achieve this in the sample that to dye the entire jumper would have taken 50-70 euros worth of dye! Obviously that wasn’t an option, so I searched online for dye that was meant specifically for wool, and came across STV Jaquard wooldye. I ordered one bag in the colour ‘vogelmuur’ (chickweed – heh, that’s actually appropriate for the WLA in more ways than one!). 20 grams, that was supposed to be more than enough to dye my 425 g jumper. I found that hard to believe. Also, the fabric had to be heated to 98°C for the dye to work properly, and I assumed it would felt, or at least shrink. But I used 1 gram of dye for another sample and it came out the perfect colour, with seemingly no shrinkage!

My dye tests. Top left is the original colour of the army sweater, 1-4 are tests with Dylon and bottom right is the final test, using wool dye

Dyeing the entire jumper with the wool dye was still a bit tricky because the largest pan I own was only just big enough to fit the jumper and enough water to cover it; it was a more cramped space than is usually the case when I use Dylon in my sink and I couldn’t really stir the jumper properly, so I was afraid it might end up with a slight tie-dye effect of more intense colour in some places than others. Also, despite using a meat thermometer, the pot accidentally started boiling. But despite all this, the jumper cane out absolutely perfect! I’m quite astonished by the quality of this dye, how little of it I needed and how even the result was despite the jumper being in the pan all crumpled. I had hoped the original olive green of the army sweater could be transformed to bright dark green, but I didn’t know this brightness would be possible and any colour at least darker than olive would have been ok. So I’m chuffed with this result =).

And here I am putting the jumper to the test at the archeological theme park Archeon with my full WLA uniform!


Took the park’s flying broom for a spin…

And, why not, a glamour photo. Because the WLA offered a healthy, happy job that did not involve 12+ hour days doing hard work in the mud, right?

If you want to read an interesting book about the WLA, I can recommend this one: