Pattern: from Vintage Lingerie by Jill Salen
Fabric: about 1.7 m fine white cotton, 1.4m
wide
Haberdasheries: 10 buttons, 1.5 m 3 mm wide
satin ribbon, 1.1 m lace, 2.6 m wide lace
The first step to making these combinations was enlarging the pattern.
Most patterns in the book Vintage Lingerie use a 1:1 inch scale, but this one
uses a 1:2 inch scale because it’s larger than most of the underwear in the
book, such as bras and tap pants. I bought squared pattern paper with 1 cm
blocks and thick lines each 5 cm specifically for enlarging patterns in books.
I looked for paper with 1 inch blocks first, but strangely, it doesn’t seem to
exist. Paper with 1 and 2 cm blocks is readily available from shops where I
live, but I’ve never really seen the use of that, and nor would it have served
my purpose now. But the 5 cm paper did, because each inch square in the book
became one 5 cm square on paper, and that made drawing the pattern quite easy.
Once I had the pattern drawn and cut out, I made a mock-up of one half
of the combinations. I expected them to be too small, since I’m quite tall for
the period, and did want to make sure I would be able to sit in them. However,
the size turned out fine, and the crotch hanging quite low enough, so the only
things I changed about the pattern were the front darts, which were originally
slightly higher than my waistline, and the scalloped edges at the neckline and
on the leg ruffles, which I omitted because I didn’t especially like them, and
they would have made it harder to neatly finish the garment.
The c. 1900 original this pattern was taken from, has an open crotch.
However, I read in Costume In Detail by Nancy Bradfield that the open crotch
style was rare after 1911, so, as I made this to wear underneath my WWI clothing,
I decided to make it close with buttons all around the bottom.
I would not recommend this pattern to inexperienced seamstresses, as
there are literally NO instructions as to how the garment should be made (apart
from two specific projects in the back, none of the patterns have any
instructions). On the one hand that was fine with me; this way, at least there
weren’t any instructions that were hard for me to understand, as with my
Simplicity projects. But some detail photographs, or a photo of what the back
of the original looks like, at least, would have been much appreciated!
Nonetheless, I think the finished item is pretty awesome =). Here it is
on me:
And here are the combinations worn with my longline corset:
Some close-ups of the lace on the leg ruffles, and how the corset
suspenders go through the gaps in the ruffles:
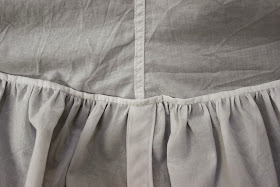
I English seamed the back and side seams, and used self-fabric bias binding
to neatly finish the lace attachments. Where fabric was gathered, I finished
the inside seams with hand-sewn sort-of French seams:


No comments:
Post a Comment