Thursday, 21 December 2017

17th Century muff


Pattern: improvised
Fabric: 19 x 50 cm silk and about 50 x 50 cm fake fur
Haberdasheries: 1 m gold band, and 76 small pearls; cooker hood filter

Yesterday I posted the cuffs and ruff I made for my husband to wear at the ‘Battle for Grol’ event. I also made something for myself, which was a nice dainty muff!

Me with the muff, although not much of it is visible! Photo by  Phil Thomason
This is the second muff I’ve made. I made a Regency muff before, and the nice thing it that the two are about as different as they could be! In the 17th century, muffs tended to be small and have fur on the inside and fur or fabric on the outside, whereas in the Regency period, muffs were huge and had fur on the outside and fabric on the inside.

On the left, a 17th century Dutchwoman with a small muff; on the right, a Regency lady with the typical large muff
To make this muff, I first took a strip of silk and sewed gold band and small pearls onto it. Then I sewed the strip into a cylinder shape. I then cut a wider piece of fake fur and sewed that into a cylinder as well, after which I added both cylinders together on one end. I then realised that if I stuffed the muff, the filling would probably look bumpy beneath the silk, so I also made a cylinder out of cooker hood filter and put that in before adding the stuffing. I placed only a little stuffing inside the tube, and added more inside the edges so they’d stand out nicely. This also makes it impossible for wind to get into the muff, so it actually keeps my hands very nicely warm! Finally, I hand sewed the last cylinder edge closed.

Sewing on the pearls
The cooker hood filter cylinder
The finished 17th century muff!


Here are my two muffs side to side for comparison:
 

Wednesday, 20 December 2017

17th Century cuffs and ruff

Pattern: improvised
Fabric: a 4.5 m long strip of fine cotton, and small pieces of fine cotton
Haberdasheries: six metal hooks


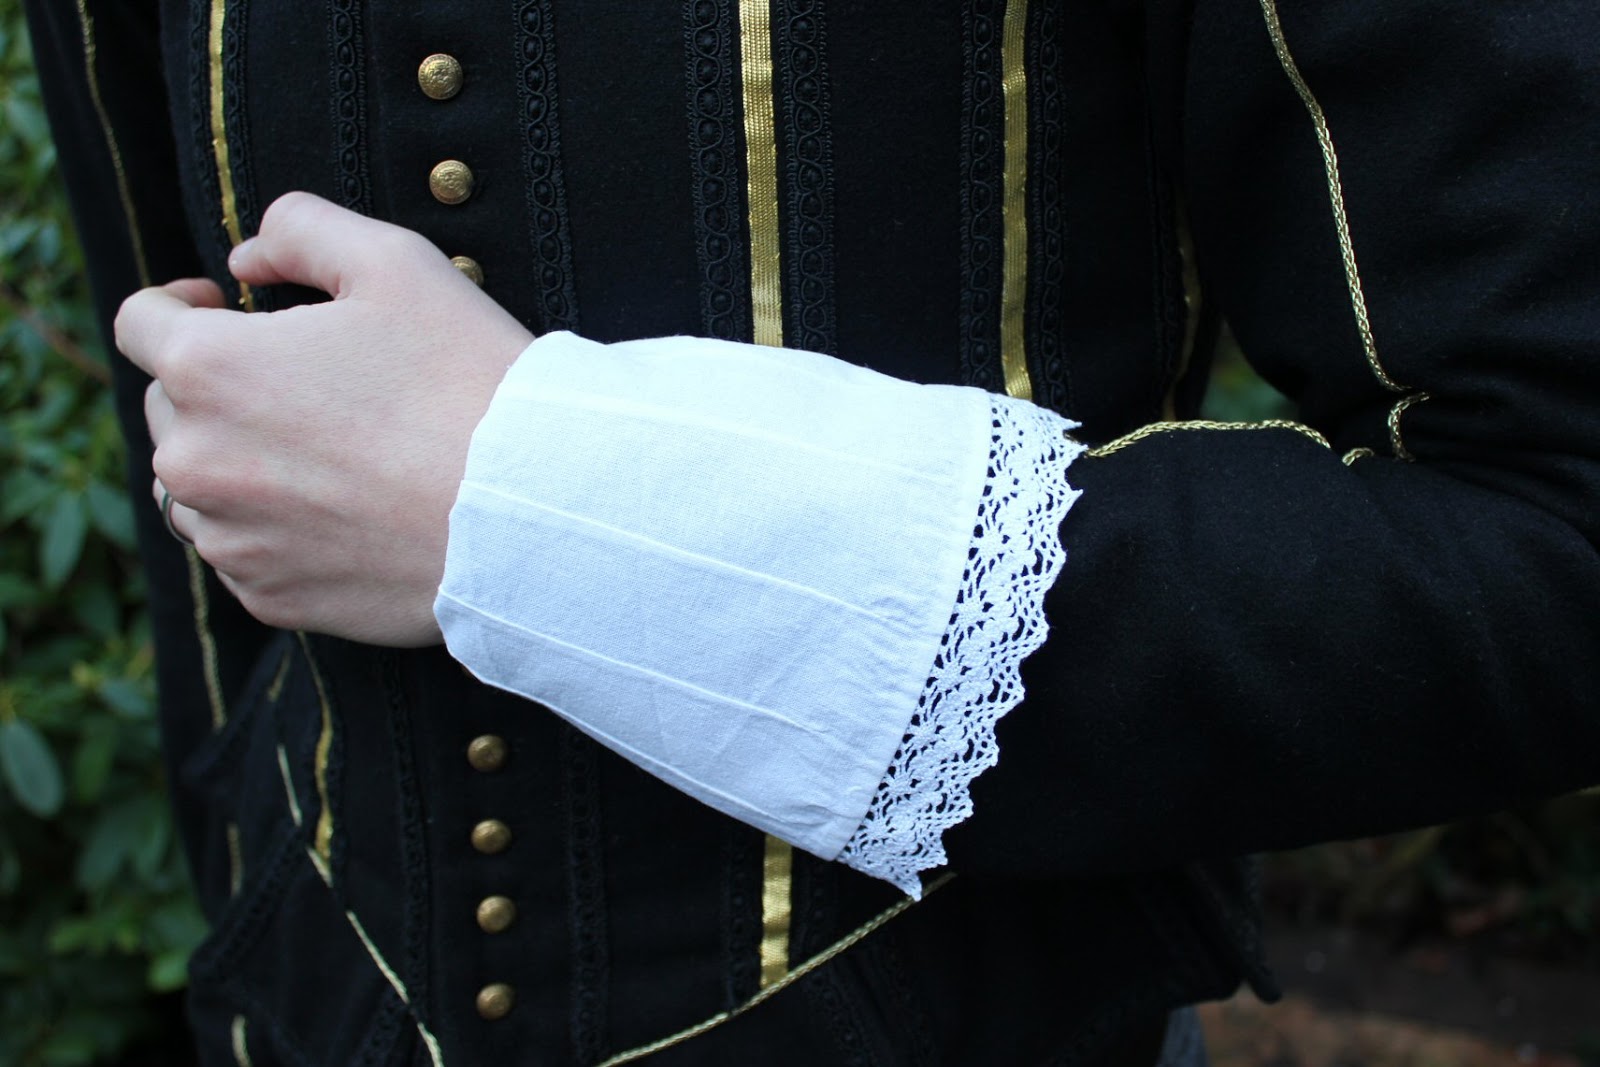
For the event ‘Battle for Grol’ that my husband and I attended this October, I added some new cuffs and a ruff to his wardrobe. He already had a flat, mid-17th century style collar, but since the siege at Grol took place in 1627, a ‘millstone’ ruff (translated from the Dutch ‘molensteen’) seemed more appropriate to us, and also, not many re-enactors wear these, even though they were very typical for the period (certainly in the Netherlands) and can be seen in many paintings.

I used fine cotton, rather than linen, for both the cuffs and ruff, both because the quality of linen that was used for these accessories at the time is unavailable nowadays, and because I know from my experience with my nurse uniforms that this cotton starches well.

For the cuffs, I cut rectangular pieces of fabric measuring 15 by 34 cm, and 8 by 23.5 cm for the wristbands. I sewed nine pleats into each cuff to give them the right shape, then attached the wristbands, and sewed on hooks and worked eyelets in such a way that the wristbands can be closed on the inside of the cuffs, and are not visible when worn.


For the ruff, I hand hemmed a 4.5 m long strip of fabric, then divided the strip into 8-shapes, hand sewed the 8-shapes together (in the 17th century, droplets of wax would have been used for this), and attached them to a neckband. I added metal hooks and worked eyelets for closing the neckband, as well.

I forgot to take photos of the cuffs before the event, so on these photos they’re wrinkled from laundering. I did actually iron them, though you wouldn’t say…


Thursday, 30 November 2017

Halloween table runner

Pattern: none
Fabric: 1.5 yard 47" wide chevron print burlap
Haberdasheries: two tassels

Last year I started decorating our house with Halloween things I brought from my trip to the USA. I also bought some chevron print burlap there, and this year, I made a runner for our dining table.

I halved the burlap lengthwise, serged the two long strips together and ran the sides under my serger as well. I used to have lots of trouble with my serger, but I had it checked and oiled earlier this year, and since then it’s been running so smoothly! It had no problem whatsoever with this burlap, even using the same settings I do for knit fabric. After serging, I folded the sides over and stitched them down, and I hand sewed two black tassels onto the ends. Voilà!


Monday, 13 November 2017

Colette Lady Grey summer coat


Pattern: Lady Grey by Colette, modified
Fabric: blue canvas-like fabric
Haberdasheries: two snap fasteners, grey fusible interfacing

Mid-November… Interesting time to post a summer (or inbetween seasons) coat. Actually, this coat has been finished for weeks and I’ve worn it lots of times already, but I didn’t get around to blogging lately. We had a 17th century event in Groenlo in late October and I was busy making lots of things for that, and also we just got a kitten!

I found this pattern on the Colette website when I was looking to buy the Ceylon dress, and since there was a sale going on, I got both. They were a more reasonable price than usually, although having to print the pattern (78 pages…) and stick all the pages together is a task I could do well without. Having done this a couple of times now, I think I will actually save myself the trouble get myself more printed patterns in future!

I love the design of this coat, with the large collar and tie belt, although I hate the 3/4 length, wide sleeves – I can’t believe most people actually make them like that, rather than modifying them. I have absolutely no use for a coat without full-length sleeves in winter, but I also don’t want one in summer, as I wear a coat for warmth. And I’m not going to bother with gloves in summer, either. So I made the sleeves quite a bit narrower, and full length. And while I was about it, I decided to add cuffs as well, with the same height as the belt.

Other alterations I made are taking off about 3 cm at the pointy bits of the collar, because I think it was a bit too wide and thought it looked strange, and lengthening the coat by 20 cm. I had been wanting elegant, longer coats for a long time, but as usually, fashion did not comply, so I had to do it myself again.

I used large snap fasteners rather than buttons and buttonholes, because I thought it likely that the buttons would just be visible besides the tie belt, and we can’t have that!


Thursday, 28 September 2017

Women’s Land Army dungarees


Just a warning – here comes the sexiest garment I’ve ever made! :P


Last year I made a Women’s Land Army hat, and now I’ve added khaki drill dungarees to my WLA wardrobe. I thought it would be nice to also have the less formal WLA uniform, besides the corduroy breeches.


I had been wanting to make these for a while, but the hardest part was finding the right fabric! It had to be cotton, but with a coarse twill weave and not the standard canvas one. And also, it had to be a very particular colour. Eventually an almost perfect fabric became available on eBay, and at only 3 euros a metre, including shipping! XD


I used an improvised pattern, and based all the stitching details on photos of original dungarees. The construction of the overlapping shoulder straps at the back is also based on existing dungarees – otherwise I would never have sewn them in such a way! This construction method, and also the less than neat stitching on the originals, clearly shows that these trousers were mass produced!
The original dungarees I used as an example had flat felled seams on both sides. They were baggy enough for this (it isn’t possible on tighter legs), but it was still a hassle to sew!


I tried to make the dungarees baggy enough to look the part, but with the right fit – they shouldn’t be all too baggy at the waist and bust. Call me delusional, but worn with a belt, I don’t actually think they’re too unflattering!